

Class on April 5 2018
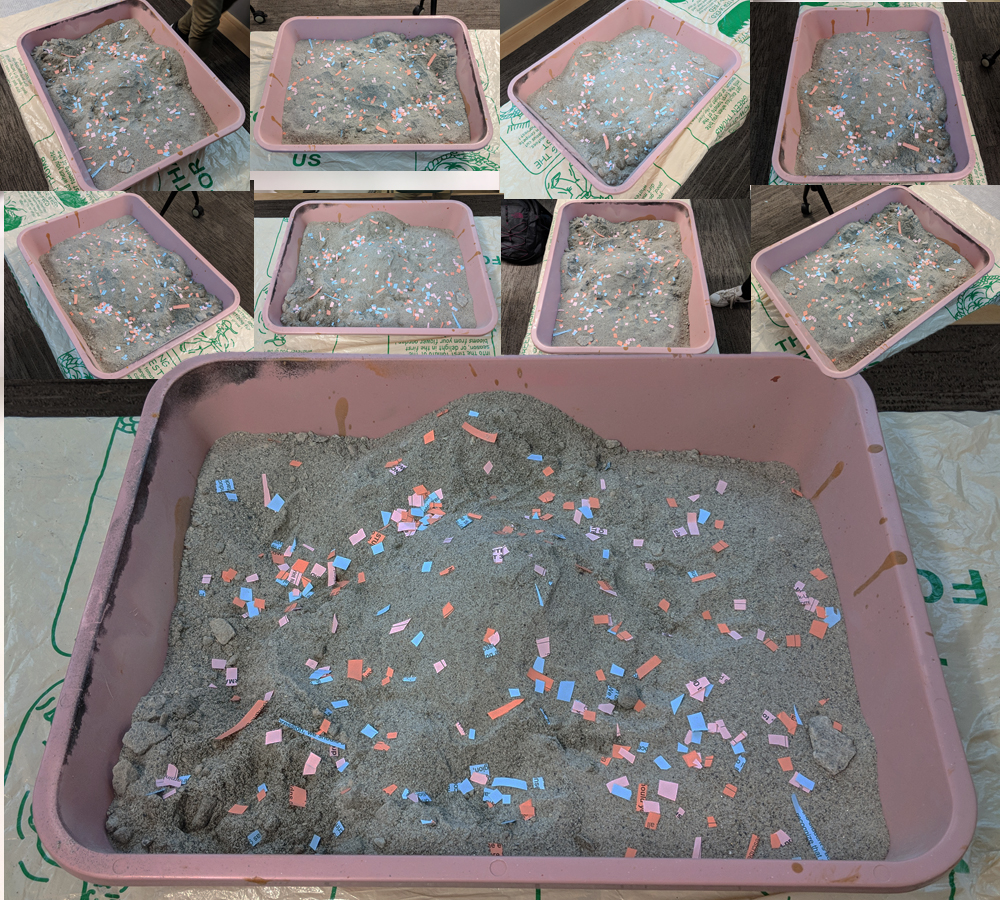
Bruce processed the data from Tuesday's simulated remote sensing exercise. Students had created the terrain shown here (and captured with eight
images spaced at 45 degrees around a vertical axis) and Bruce performed the steps outlined in class:
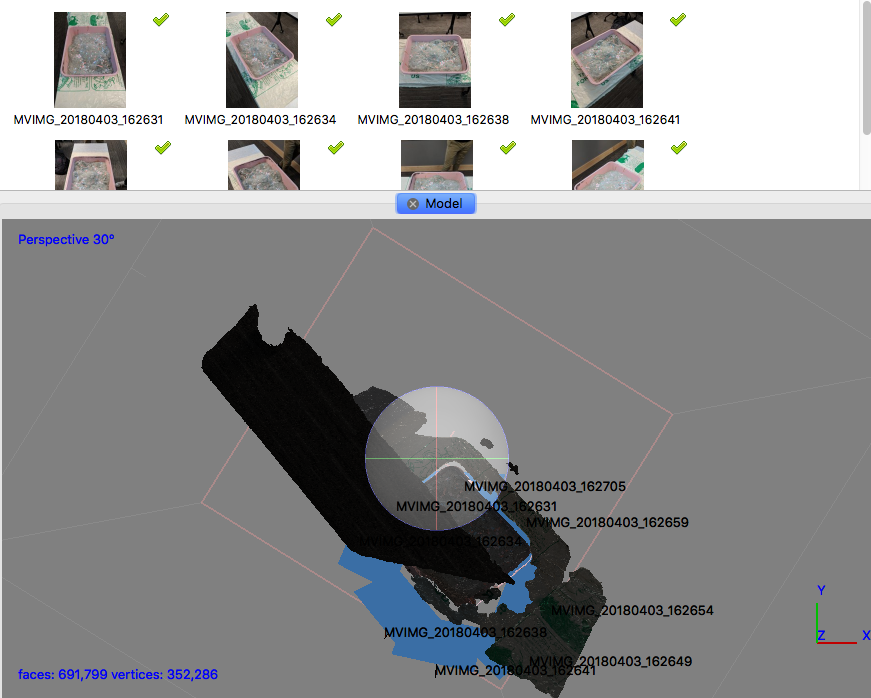
The eight images were all recognized by the PhotoScan Pro software and so photo alignment, dense point cloud generation, and mesh generation were successful with the images as Photo inputs as seen here:
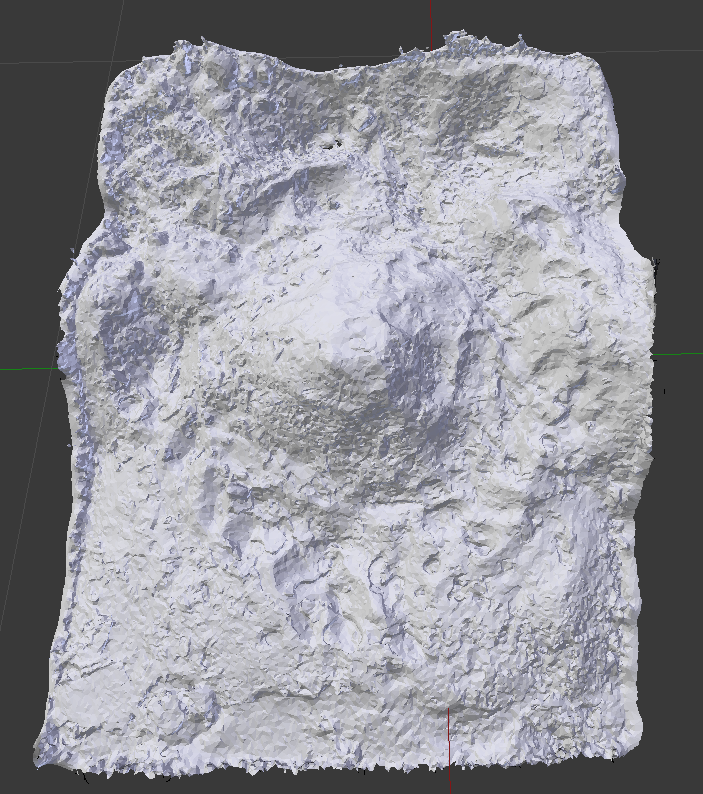
The exported .OBJ mesh file was brought into Blender and aligned with the X-Y plane. From a top view, it looked like:
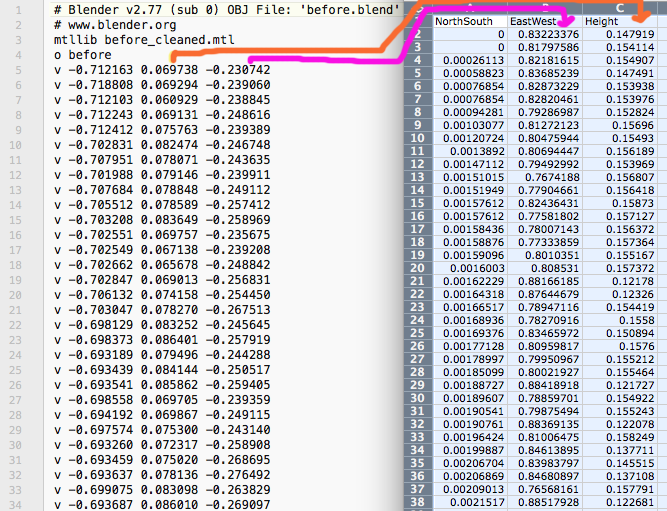
Bruce then used a text editor to copy all the vertex information from the .OBJ file (those lines preceded with a v) into Excel to create a CSV file as seen below. Since Blender uses a Y-up standard and we want to use Z as our height field, Bruce had to put the second vertex value in the third column and the third vertex value in the second column. Bruce also normalized the first two columns so their values went from 0 to 1 (in both directions). To normalize, he first added the same value to all cells to get the lowest value to be 0. He then divided all cells by the largest value to get the largest value to be 1.
Bruce repeated the steps for the after images of the sandbox after the violent shaking perfomed to simulate a massive earthquake. The .OBJ files used and .CSV files generated included: Bruce then used the two CSV files to perform the same before and after analysis that he demonstrated in the previous class. The Jupyter Python notebook he used is available as Change-Analysis.ipynb. Since no sand was added or removed during the earthquake, Bruce adjusted the after CSV file to have the same average height as the before CSV file. The analysis verified that value is 0.07119823 simulated units. Running the notebook produced the plot here:
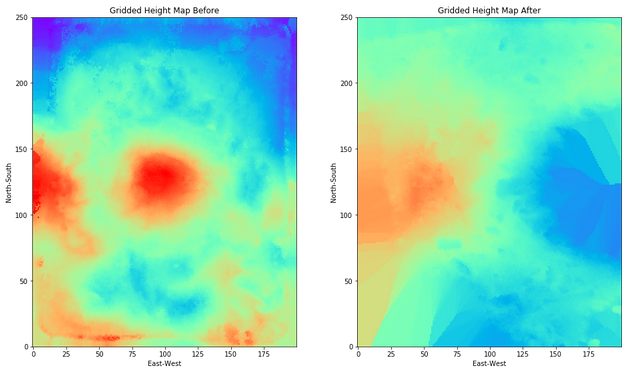
Note the limited resolution in the after plot in the right and lower areas. The after images included significant clipping of those areas in the photos but those areas were quite flat upon inspection of the images involved. Students were asked to continue to work on the steps used above and to collaborate to find the best photo sets to use for processing.
The eight images were all recognized by the PhotoScan Pro software and so photo alignment, dense point cloud generation, and mesh generation were successful with the images as Photo inputs as seen here:
The exported .OBJ mesh file was brought into Blender and aligned with the X-Y plane. From a top view, it looked like:
Bruce then used a text editor to copy all the vertex information from the .OBJ file (those lines preceded with a v) into Excel to create a CSV file as seen below. Since Blender uses a Y-up standard and we want to use Z as our height field, Bruce had to put the second vertex value in the third column and the third vertex value in the second column. Bruce also normalized the first two columns so their values went from 0 to 1 (in both directions). To normalize, he first added the same value to all cells to get the lowest value to be 0. He then divided all cells by the largest value to get the largest value to be 1.
Bruce repeated the steps for the after images of the sandbox after the violent shaking perfomed to simulate a massive earthquake. The .OBJ files used and .CSV files generated included: Bruce then used the two CSV files to perform the same before and after analysis that he demonstrated in the previous class. The Jupyter Python notebook he used is available as Change-Analysis.ipynb. Since no sand was added or removed during the earthquake, Bruce adjusted the after CSV file to have the same average height as the before CSV file. The analysis verified that value is 0.07119823 simulated units. Running the notebook produced the plot here:
Note the limited resolution in the after plot in the right and lower areas. The after images included significant clipping of those areas in the photos but those areas were quite flat upon inspection of the images involved. Students were asked to continue to work on the steps used above and to collaborate to find the best photo sets to use for processing.